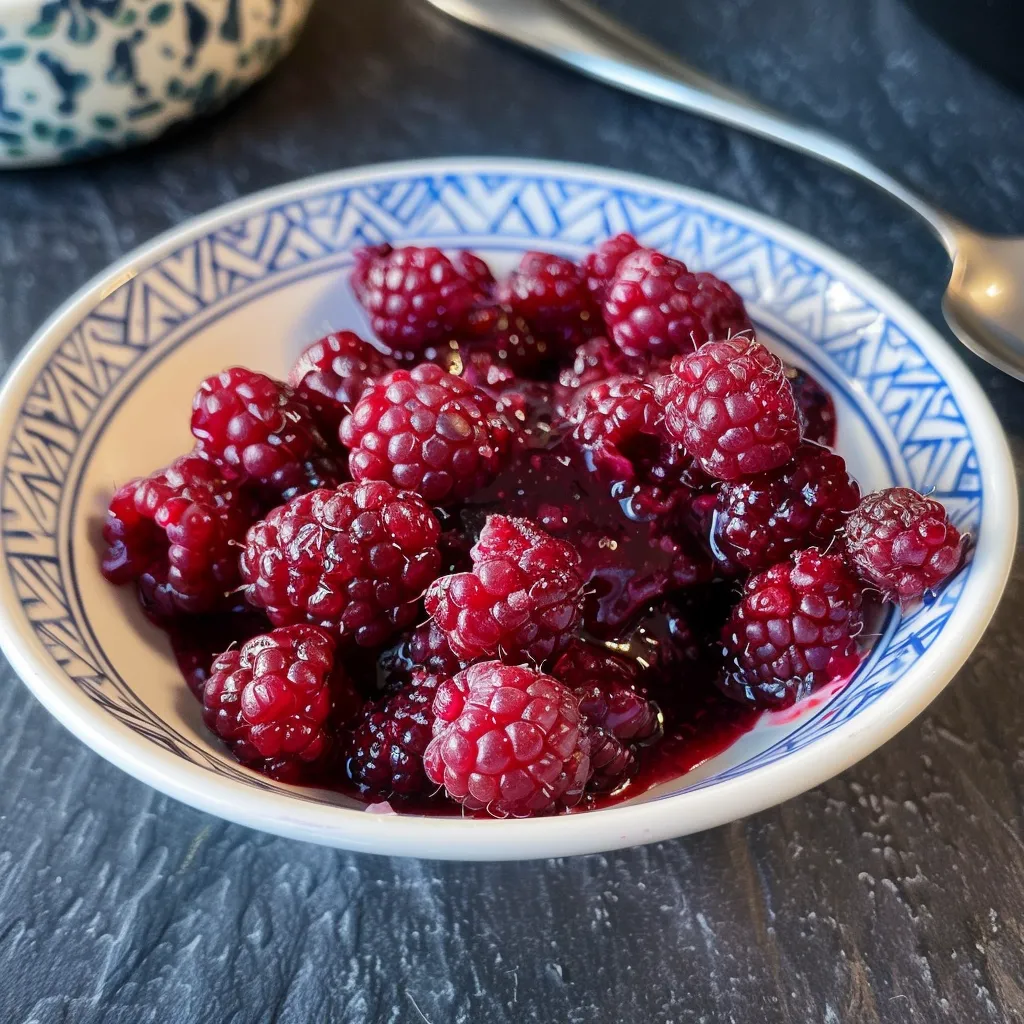
There’s something truly special about homemade jam, isn’t there? The way it captures the sweetness of fresh fruit, the joy of creating something delicious in your own kitchen, and the satisfaction of sharing it with loved ones. Today, I’m excited to share with you how to make Black Raspberry Jam—a recipe that’s not only easy but also bursting with flavor. Whether you’re a seasoned jam-maker or a beginner, this guide will walk you through every step, ensuring your success. So, let’s get started!

Why You’ll Love This Recipe
- Simple ingredients: Just black raspberries and sugar—no pectin needed!
- Easy to make: Perfect for beginners, with clear, step-by-step instructions.
- Customizable: Adjust the sugar to your taste or try adding a hint of spice for a unique twist.
- Perfect for gifting: Homemade jam makes a thoughtful and delicious gift for friends and family.
Ingredients
Here’s what you’ll need to make this delicious Black Raspberry Jam:
- 5 cups of fresh black raspberries
- 3 cups of granulated sugar
Full ingredient list with measurements is provided in the printable recipe card below.
How to Make the Recipe
Let’s dive into the step-by-step process of making Black Raspberry Jam. Don’t worry if you’re new to jam-making; I’ve got you covered!
Step 1: Prepare Your Ingredients
If you haven’t already, measure out your raspberries and sugar. Rinse the raspberries gently and remove any stems or debris.
Step 2: Sanitize Your Jars
Wash and sanitize 4 1/2 pint jars, rings, and lids. Keep them warm by placing them in a simmering pot of water or by running them through a dishwasher cycle. Fill the canner with enough water to cover the jars by at least 2 inches of water. Cover and heat on high, but keep an eye on the temperature—you want a simmer, not a boil, when you place the jars in the water.
Step 3: Cook the Raspberries
In a large, shallow kettle, smash the raspberries with a potato masher. Stir in the sugar and begin to heat over medium-high heat, stirring often. Smash more raspberries as they cook down to release their juices.
Step 4: Reach the Gelling Point
Heat the mixture to 8 degrees above the boiling point of water. If you’re at sea level, the gelling point is at 220 degrees. For every 1,000 feet of elevation, subtract 2 degrees. Use a candy thermometer to monitor the temperature accurately.
Step 5: Fill the Jars
Once the jam has reached the gelling point, remove it from the heat. Ladle the jam into the prepared jars, leaving ½ inch of headspace. Wipe the rims of the jars with a damp cloth, add the lids and rings, and tighten them to fingertip tight.
Step 6: Process the Jars
Place the jars in the canner, making sure they’re covered by at least 2 inches of water. Bring the canner to a boil, then process the jars for 10 minutes. Remove the jars from the canner and let them cool in the canner for 5 minutes before transferring them to a wire rack to cool completely. Let the jars rest for 12 hours before storing them.
Pro Tips for Making the Recipe
Here are a few tips to ensure your Black Raspberry Jam turns out perfectly every time:
- Use Fresh Raspberries: Fresh raspberries will give your jam the best flavor and texture. If you’re using frozen raspberries, make sure to thaw them first and pat dry to remove excess moisture.
- Don’t Overcook: Overcooking can make the jam too thick and lose its vibrant flavor. Keep an eye on the temperature and stop once it reaches the gelling point.
- Sanitize Everything: Proper sanitation is key to ensuring your jam will be safe to eat and won’t spoil. Make sure all utensils and jars are clean and sanitized.
How to Serve
Homemade Black Raspberry Jam is incredibly versatile. Here are a few ways to enjoy it:
- Toast and Biscuits: Spread a layer on your morning toast or biscuits for a sweet and tangy start to the day.
- Yogurt and Oatmeal: Add a spoonful to your yogurt or oatmeal for a burst of flavor and color.
- Gift Ideas: Pour the jam into decorative jars and give it as a gift to friends and family. You can also pair it with other homemade treats for a thoughtful gift basket.
Make Ahead and Storage
One of the best things about homemade jam is that it can be made ahead of time and stored for later use. Here’s how to store your Black Raspberry Jam:
- Sealed Jars: Store sealed jars in a cool, dark place for up to 12 months. Once opened, keep the jar in the refrigerator and use within 6 months.
- Freezer: If you prefer, you can also store the jam in an airtight container in the freezer for up to 2 years. Simply thaw in the refrigerator when you’re ready to use it.
And there you have it—a simple and delicious recipe for Black Raspberry Jam that’s perfect for any occasion. Whether you’re making it for your family or as a gift, this jam is sure to be a hit. Don’t forget to check out our other jam recipes, like How to Make Wild Black Raspberry Jam Perfectly Delicious, How to Make Seedless Black Raspberry Jam: A Simple Recipe, and How to Make Black Raspberry Jelly: Seedless Easy Recipe, for more jam-making inspiration!
Black Raspberry Jam
Ingredients
Method
- Measure out raspberries and sugar. Wash and sanitize jars, rings, and lids. Prepare canner with water and heat to a simmer.
- Smash raspberries with a potato masher in a large kettle. Stir in sugar and heat over medium-high, smashing more as they cook.
- Bring mixture to 220°F (adjust for elevation) to reach the gelling point.
- Ladle jam into prepared jars, leaving ½ inch head space. Wipe rims, add lids and rings, and place in the canner.
- Process jars for 10 minutes in boiling water, then let cool in the canner for 5 minutes before removing.
- Let jars rest for 12 hours before storing.