There’s something truly special about homemade jam, isn’t there? The way it captures the essence of fresh fruit, the joy of creating something delicious from scratch, and the satisfaction of seeing those neatly filled jars on your pantry shelf. Today, I’m thrilled to share with you my recipe for Wild Black Raspberry Jam that’s not only delicious but also surprisingly easy to make. Whether you’re a seasoned canner or a beginner, this recipe is perfect for anyone looking to enjoy the sweet taste of summer all year round.


Why You’ll Love This Recipe
- Perfect balance of sweet and tangy flavors
- Easy to follow, step-by-step instructions
- Great way to preserve fresh berries
- Beautiful jars to give as gifts or enjoy yourself
- Works wonderfully with both black raspberries and blackberries
Ingredients
Here’s what you’ll need to make this delicious Wild Black Raspberry Jam:
- 4.5 cups crushed black raspberries or blackberries
- 3 cups white, granulated sugar
- 1/8 teaspoon vanilla bean paste
- 1 teaspoon lemon juice
Full ingredient list with measurements is provided in the printable recipe card below.
How to Make the Recipe
Let’s dive into the step-by-step process of making this Wild Black Raspberry Jam. Don’t worry, it’s easier than you think!
Step 1: Prepare the Water Bath
Start by filling a large pot halfway with water and bringing it to a boil. Reduce the heat to maintain a simmer at 180°F. This will be your water bath for processing the jars later.
Step 2: Harvest and Prepare the Berries
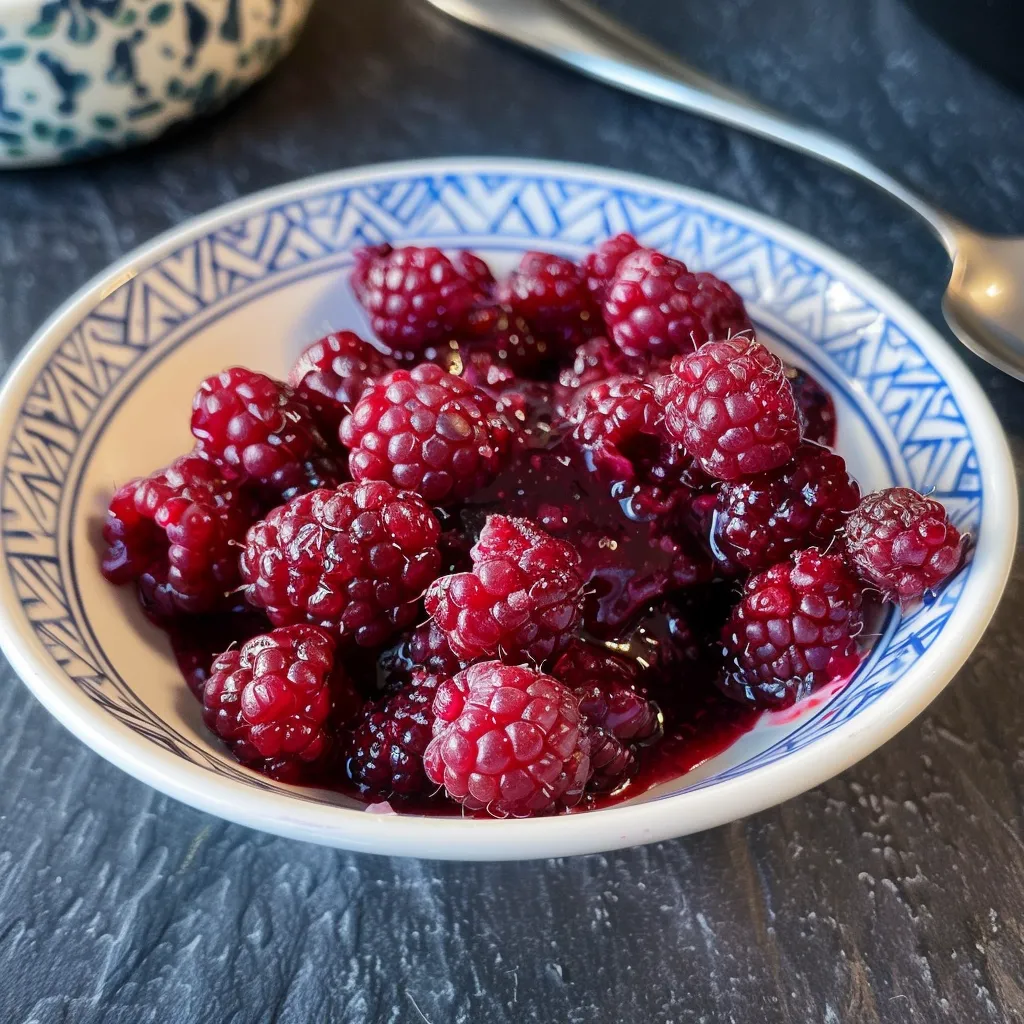
Harvest, wash, and drain your berries. If using blackberries, you can skip the crushing step if they’re already soft. For black raspberries, use a potato masher or wooden spoon to crush them until coarse. You’ll need about 4.5 cups of crushed berries with their juice.
Step 3: Combine Ingredients
In a large saucepan, combine the crushed berries, sugar, lemon juice, and vanilla bean paste. Stir well to mix everything together.
Step 4: Bring to a Boil
Place the saucepan over low-medium heat and slowly bring the mixture to a boil, stirring occasionally, until the sugar has dissolved. Once the sugar is dissolved, increase the heat to medium-high and bring the mixture to the gelling point of 220°F, stirring constantly.
Step 5: Fill the Jars
Carefully ladle the hot jam into hot, sterilized mason jars, leaving about 1/4 inch of headspace. Tap gently to remove any bubbles, clean the jar rims as needed, and secure the lids and bands tightly. Repeat until all jars are filled.
Step 6: Process the Jars
Place the sealed jars on the rack in the boiling-water processor, making sure they’re covered by at least an inch of water. Bring the water to a rolling boil, cover, and let boil for 15 minutes. After processing, turn off the heat and let the jars sit for 5 minutes before removing them from the canner.
Step 7: Cool and Store
Let the jars cool at room temperature for 12 hours before labeling and storing them. The jam will keep for up to 6 months in a cool, dark place, or up to a year if stored properly.
Pro Tips for Making the Recipe
Here are a few tips to ensure your Wild Black Raspberry Jam turns out perfectly every time:
- Use fresh, ripe berries for the best flavor.
- Don’t skip the lemon juice—it helps balance the sweetness and preserves the color.
- Invest in a candy thermometer for accurate temperature readings.
- Always sterilize your jars and utensils to ensure proper canning.
How to Serve
Homemade jam is incredibly versatile! Here are a few ways to enjoy your Wild Black Raspberry Jam:
- Spread it on toast, biscuits, or English muffins
- Use it as a topping for yogurt, oatmeal, or ice cream
- Glaze meats or cheeses for a sweet and savory combination
- Add it to your favorite smoothie recipe
Make Ahead and Storage
One of the best things about homemade jam is how well it keeps. Store your sealed jars in a cool, dark place for up to a year. Once opened, keep the jar in the refrigerator for up to 6 months. The jam will thicken a bit in the fridge, but it will still taste delicious!
Looking for more ways to use up your black raspberries? Check out my post on How to Make Canning Black Raspberry Pie Filling for another delicious way to preserve these tasty berries.
There you have it—everything you need to make your own Wild Black Raspberry Jam at home. It’s a great project for a weekend afternoon and makes perfect gifts for friends and family. Happy canning!
Wild Black Raspberry Jam
Ingredients
Method
- Harvest, wash, and drain the berries. Crush them until coarse and measure out 4.5 cups.
- Mix crushed berries, sugar, lemon juice, and vanilla in a large saucepan. Bring to a boil over low-medium heat, stirring occasionally until sugar dissolves.
- Increase heat to medium-high and bring mixture to 220°F, stirring constantly. Remove from heat.
- Ladle hot jam into sterilized mason jars, leaving 1/4 inch headspace. Process jars in a boiling-water bath for 15 minutes.
- Let jars cool at room temperature for 12 hours before labeling and storing.